March 31, 2017

Painted Globes | American Crafts

It's Friday and I'm headed out of town soon! Can you tell I'm excited? My husband's birthday signals two things - Spring and a trip to Atlantic City. The man loves to gamble but at the same time let's just say he's quite attached to his money. The one exception - his birthday weekend. So while I'm packing up to head south, here's a peek at something I made recently.


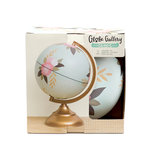
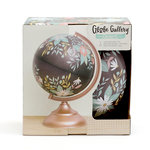
Introducing Globe Gallery from American CraftsI love finding interesting things to decorate my craft space and the Globe Gallery by One Canoe Two is perfection! At just under 12 inches tall, they are the perfect size for any desk or shelf. I love all of the custom accents that can be added to personalize the base globe making each one a unique creation. They come in five different themes from constellations to wildflower. I love them all!


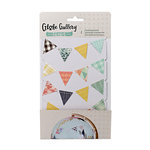
I chose the Map design with it’s beautiful script writing and gold base. I used the collection bunting and wrapped it around the globe twice overlapping. This adds a nice punch of color to the blue and aqua background.  The adhesive backed pushpins keep the strands in place. It's easy peasy decorating!


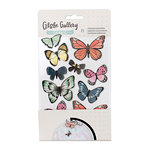
I used just a few 3-D butterflies from the collection and placed them along the strings of the bunting to add a pop of texture to the globe.
To add an element of texture to the base, I used the Life is Lovely Vinyl cling on to add tone-on-tone words.

Keeping the same design principle of gold on gold, I added adhesive nail heads from the collection along the arm of the globe. They were really made for marking places on the globe itself, but I thought why the heck not?  I'm a little craft rebel like that. 

This project took me under an hour from start to finish. I need more of the types of easy projects in my creative life! You can check out the entire Globe Gallery line here. 


I'll be back next week with more crafty projects. Have a great weekend and wish me luck! (Um, I mostly shop in Atlantic City, so the odds are good).

SUPPLIES | Click on the photos for more info
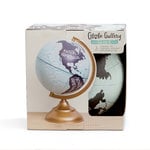


1 Canoe 2 - Globe Gallery Collection - Globe - 8 Inches - Map 1 Canoe 2 - Globe Gallery Collection - Globe - 8 Inches - Rose 1 Canoe 2 - Globe Gallery Collection - Globe - 8 Inches - Wildflower 1 Canoe 2 - Globe Gallery Collection - Bunting - 68 Inches 1 Canoe 2 - Globe Gallery Collection - Bunting - 68 Inches 1 Canoe 2 - Globe Gallery Collection - 3 Dimensional Butterfly

March 30, 2017

Project Life | Elle's Studio


Let's take one final look at the  Elle's Studio Birthday Kit. You can see other project I made with this kit here. It's hard to believe that they were both made with the same kit. That's how you know it's a good one!


Here I took out all the red, pink and golden yellow elements to create this spread about my niece's birthday. Around here we have something called the "birthday weekend", so we celebrate the actual birth date, then there's the family birthday bash and then to cap off the birthday weekend. Yes, we like to celebrate! These photos are from that weekend. They highlight the places and things my niece chose to do - it was all about the "A Dog's Life Movie", watermelon and swimming.


I painted the wood veneer number "9"to give is a pop of color, then added a line of stamped text and a few embellishments. You know I can't leave anything plain! That pocket of goodness in the center is my favorite, just after the dog stamp and the watermelon photo. I have a lot of favorites.

Check out the Elle's Studio kits, they are beautifully designed and easy to use! The birthday one is a limited edition, so make sure if you want it you grab it here.


March 29, 2017

Painted Butterflies and Golden Bees| Studio Calico Kit

I don't do plain, it's just that simple. It's not in my genes! I'm a color and pattern and texture girl so when I come across wood veneer, I immediately want to alter it. So when I came across this butterfly border in the Studio Calico Birds and the Bees, I thought - paint!

I used washi tape to mask of one section of the butterfly at a time to create this black and white speckled beauties. The trick here is to let each section dry completely before masking. This takes patience and a little paint. I chose the colors right from the photo. The artist who painted that mural has awesome taste.

The rest of the design is very simple. Lots of layers under the photo so that it doesn't get lost amongst the butterflies. A few circle chipboard sentiments scattered here and there plus some journaling strips.


I added the transparency alphabet and some stamped sentiments right on the wood to finish off the layout. This was a fun one, the painty ones usually are. 


My second Birds and Bees kit layout is this one about coffee and Hawaii, two of my favorite subjects.  This one is all about that gold bee vellum. Swoon. I cut it up into different sized squares and just layered my heart out.


Next came a row of chipboard circles in different colors along the top center of the design. I thought of these almost like a stone path that led to the photo and story. I love that it breaks up the "softness" of the vellum.


I love the botanical feel of this one. It goes perfectly with the photo and the story. I struggled with this one a little. That happens sometimes when I'm using something I really love (gold bees!). The perfection gene takes over and that just makes creating so much harder than it needs to be. I keep reminding myself but it's hard to beat back that perfection monster!

I have two more project life spreads that I made with this kit, I'll be back soon to share.


SUPPLIES | Studio Calico March Kit - Birds and the Bees

March 28, 2017

Designing a Page | Elle' Studio March Kit


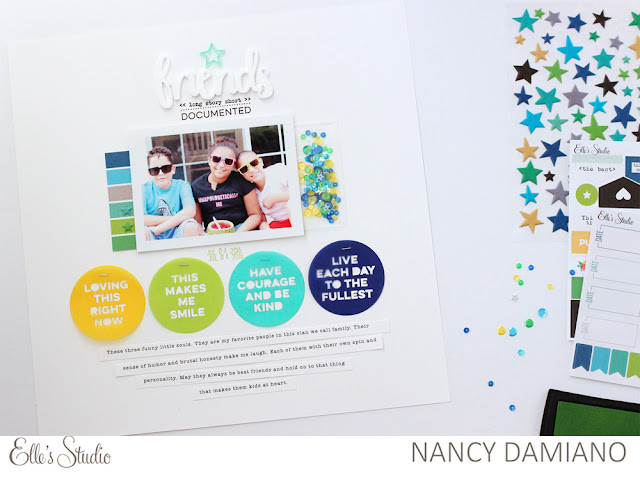
Circle, circles, circles. I haven't met one I didn't love. It's one of my design go to's when I want to create a quick bold look. So this month when I opened my Elle's Studio March kit, the first thing that hit me was this collection of large vellum circles in navy, aqua, lime, and sunshine yellow. Complete with sentiments in the center - hello beautiful!


I thought about the words and shuffled around the colors a bit when looking through photos I keep aside to scrap. The one of the kids jumped out at me - it went perfectly with both. They are still very much at a monkey-see, monkey-do stage and in this photo their sense of humor and bond comes shining through. This is what I wanted to say and now I had just the right kit to do it with - thank you Elle's Studio!

So first things first - I lined up those beautiful vellum circles photo right underneath the photo to call attention to it. That decision led to lining everything up in the center of the page - so that's where I went next.


Up at the very top I centered everything. An aqua acrylic star, the acrylic friends title and some stamped sentiments. They all frame out the photo, add texture and pops of color. The centering ties everything together.


Once I had everything lined up, I was thinking about "what am I going to add that's a little design twist." That's always the goal when I'm creating. I had a package of the kit sequins right next to my workspace and though, "hey, what if I just put the package right on the page?". That led me to create a small shaker out of a divided page protector. I tucked it right under the photo and I think it lends that element of interesting and pop of color. Clear pockets filled with fun are always fun.


And that's it - the story of how the layout came to be. It's so easy to create when the hard work of design has been started for you. I can always, always count on Elle's Studio to give me great colors and shapes to work with. That's half the design battle right there! Check out more beautiful designs by Elle here.

Thanks for stopping by! Coming up tomorrow I have painted butterflies and art. See you then.

March 27, 2017

Felicity Jane Kit | Watercolor Beginner

I've been playing with watercolors lately and it's been a challenge. A fun one, but I still struggle with the fluid imperfection of it. My very linear brain wants to control the flow of the water and it just ain't gonna happen. So this is a good exercise in non perfection for me. To keep this creative thing going, I need to challenge myself and step out of the box. So this is me stepping.


I used pink and orange watercolors from my Zig Kuretake set to create the background. I like that shade of orange that was created where the two colors mixed. I thought this was a good colorful background for the Jane girl illustration from the Felicity Jane March kit.  There's something so parisian and ooh-la-lat about her. I wanted a bold splash of color behind her.


You see that hard line of pink on the right side of the watercolor? That's a boo-boo. It happens when you use too much water and don't blot it right away. A hard line of color pools and you get that up there. I'm a rookie, so it happens. I left it though because even though technically it's a mistake I kind of like the way it looks.


I hand cut the roses from a Felicity Jane patterned paper to give her someplace to sit. A fancy little shelf. A stamped sentiment and some black wave washi complete the card.

I like cards because they're tiny canvases I can stretch my creative trials (and errors) on. They're a much smaller investment than a big 12x12 layout. And when I make mistakes like on this one, I roll with it and move on to the next canvas.

Thanks so much for stopping by. This week I'm focusing on painted butterflies, globes and some project life spreads I've made this month. Be back soon!

SUPPLIES Jane Kit Jane Stamp | Jane Washi Strips

March 24, 2017

Project Life | Documenting TV Habits


I've been binging shows for probably two years now and it never occurred to me to document what I watch! When I got Elle's Studio TV Journaling Tags it was the perfect opportunity to do just that.

I started by getting photos from Google and printing them out at 3x4. These would be the base of my layout. I used my Silhouette to cut out large numbers and then laid those over the pictures in favorite order.


The center card is where I wanted to put all the color and fun in. I used Elle's tiny alphabet stickers to repeated run the word Netflix down the card. I love that it personalizes the card and that the alphas match the colors in all of Elle's cards seamlessly.

I love the matching TV Stamp Set that coordinates with these cards. I used a bit here and there to add some text and punches of colors to all of the cards. I love the charm that stamping adds to my project life spreads.


Take a look at the Elle's Studio cards and kits. They are chock full of design and color goodness. A favorite of mine for sure.

SUPPLIES | TV Journaling Tags | TV Stamp Set | TV Wood Veneer | Elle's Tiny Alphas

March 10, 2017

Elle's Studio + Birthday Memories

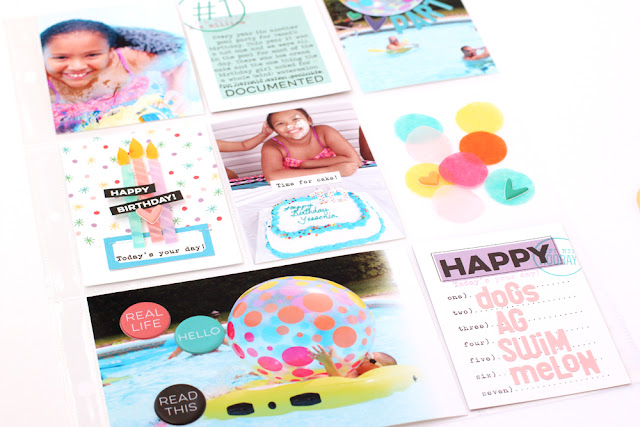
Elle Studio is release their March kits today and they are beautiful! Along with the regular monthly kit, a special edition birthday kit is being released in celebration of Elle's 10th year in business. I used the birthday kit to create this colorful spread.

These photos are from my niece's birthday party this summer. It seems that no matter what color schemes my photos are, some how I can find something in the Elle kits to compliment them. I love that!


I paired a card and stickers from the birthday kit with the acrylic candle add-ons. Those make me very happy! Layering a label just under the candles grounded them to the card. Layering two black label stickers and a puffy heart added a third layer to the card.


I like to fill out cards with alpha stickers. The mini alphas from Elle's Studio not only match in color, but also in size. I like adding text that's custom to the event in these cards.

And my favorite thing - adding bits of the unexpected to pockets. Here it's the confetti that came with the "surprise pack" included with every order of the birthday kit. I knew I had to find a way to recycle these and they were perfect for this layout.

Check out Elle's Studio blog for more inspiration using the monthly and birthday kits this month! You can sign up for a monthly kit here. Thanks for stopping by!


March 9, 2017

Neat and Tangled March Release Day 4 | Classic Tags 2

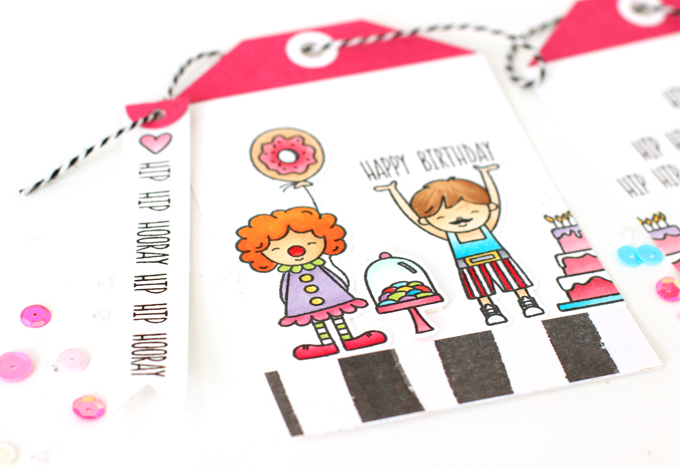
Welcome to the last day of the Neat and Tangled March release. Today we have the Classic Tags 2 steel die. I love the versatility of this die set. I used it here to create a small birthday banner.

To add a punch of color to the basic white tag, I stamped a scene with the Big Top Birthday stamp and steel die set and colored it with copic markers. This stamp set is one of my favorites from Neat and Tangled. I like to color and this one is perfect for bold color palettes.


The Classic Tags 2 steel die includes the tag toppers and circle reinforcements. This makes creating custom tags quick and easy. I added a strip of black and white patterned paper to edge of the tags to give the stamped images a "ground".


The Class Tag 2 steel die also includes banner tags with reinforcements like the one above. I love to add stamped words to customize these small tags.

Neat and Tangled will be giving away a Classic Tags 2 steel die set. To enter, leave a comment below to be entered. Tell me what's your favorite Neat and Tangled Stamp set. Visit the Neat and Tangled blog on Friday for a list of winners. Good luck!


March 8, 2017

Neat and Tangled March Release Day 3 | Flower Medallion

Today we've got florals! the Neat and Tangled Flower Medallion stamp set and die are a beautiful, solid pattern to add to your collection. I used he steel die to create the petals on this pretty flower.


The green petals were stamped with shades of green ink and then cut out with a steel die. It's a really simple and bold design with a pop of sequins.


Neat and Tangled will be giving away a Flower Medallion stamp set. To enter, leave a comment below to be entered. Tell me what's your favorite coloring medium. Visit the Neat and Tangled blog on Friday for a list of winners. Good luck!


March 7, 2017

Neat and Tangled March Release Day 2: Tiny Cuts Steel Die

Hey everyone, welcome to day two of the Neat and Tangled March release. Today I have paired up the brand new Tiny Cuts steel die set and the Kitty's Favorite Things stamp set.


I love the detail that these intricate borders add. Here I used them to create a punch of texture and color to edge of this card.


The Kitty's Favorite Things stamp and steel die set are fun to color. Here I used Copic markers to add a splash of color to some of the images. I layered the banner and kitty with foam tape to pop them up a bit.


Neat and Tangled will be giving away a Yo Ho stamp set. To enter, leave a comment below to be entered. Tell me what's your favorite coloring medium. Visit the Neat and Tangled blog on Friday for a list of winners. Good luck!

SUPPLIES | Click on the photo for more info


Tsukineko - Memento LUXE - Fade Resistant Dye Inkpad - Tuxedo Black Neat and Tangled - Nice and Neat Die - Kitty's Favorite Things Neat and Tangled - Clear Acrylic Stamps - Kitty's Favorite Thing

March 6, 2017

Hey there, welcome to the March Neat and Tangled release. The first stamp set up is the Yo Ho set of pirates which I love. I especially love that there is a girl pirate!


I created this card on kraft cardstock, stamping the images with Versafine ink. Then I used my Prismacolor Pencils to add a splash of color to the scene. This is the first time that I've tried this technique. I found that blending shades with colored pencils was much easier than with Copics. I could even erase mistakes. I thought this was a pretty good result for a first try. 


To create some texture between the white card base and the kraft scene, I used a fringe steel die to create the layered pop of blue in the center. It's a really simple way to add color and texture to any card.


Neat and Tangled will be giving away a Yo Ho stamp set. To enter, leave a comment below to be entered. Tell me what's your favorite coloring medium. Visit the Neat and Tangled blog on Friday for a list of winners. Good luck!

SUPPLY LIST | Click on the photos for more info