January 31, 2013

Wrapping Up Some Winners

I've been sketching out a lot of one photo layouts lately, which is really pretty unusual for me. I like to tell a story with at least two photos, preferably three. But every once in a while I run across a favorite picture that tells the complete story. That's definitely the case with this one.

My husband and niece are very close. They share a special bond - it's called, she whines and he delivers. Ha!, kidding I think. There's something very special in her expression in this pic and I wanted to highlight that.

I created this layout for the Jillibean Soup blog mixing up a bunch of their different paper lines and embellishments. I like how their lines are really mix and match.

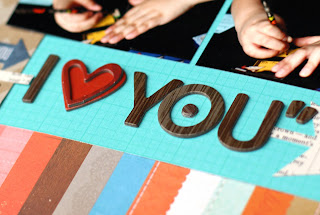
The layout is really clean + simple and lets the photo really stand out. The title was cut using the Silhouette and one of my favorite fonts, Lobster. I placed pop dots underneath so that it would stand out from the cream cardstock. While the title is huge and really sets the theme for the page, I think it's subtle enough to let the photo shine.

Now let's finish up with a few winners! I love giving stuff away, so it's a good day.  First up, the winner of a spot in Julie Campbell's Journey into Cardmaking over at 2Peas is....


julie e said...Thanks for the chance to win the spot in the class.
and the winner of a current collection pack from Echo Park is...
Liana S. said...Such a cute card. I always love everything you create. :)
Congrats ladies, I'll be emailing you today regarding your prizes. Thanks so much for playing along.


January 22, 2013

It's the 22nd! And that means a hop of Two Peas in a Bucket Garden Girls with news, sneak peeks and giveaways from my favorite scrapbooking place twopeasinabucket.com.
 A sneak peek at a project I have coming soon to the Garden. Our theme is Valentine's and I went with a non-traditional color palette + loads of hearts. 
This month I'm inspired by fellow Pea Sarahak. I love how she uses bold, clean lines and beautiful photos to tell her story. For more inspiration check out her gallery.

Some favorite products that I'm using on my projects right now:

1. Basic Grey True Love Collection
2. Jenni Bowlin Quilt Star Punch
3. Mama Elephant On Target Stamp
4. Photo Freedom Volume 1
5. Die cut flash cards by Fancy Pants

A now for the giveaway. Just leave a comment by 1/29/13 to win a spot in Julie Campbell's Journey into Card Making class. Good Luck!
"Become adventurous and explore some of the hottest trends in paper crafting! In this workshop, you’ll also learn how to incorporate colors in your projects & how to create cards in several unique styles. 

Included in this workshop are over 30 brand-new card samples from Julie and her contributors. The three chapters contain a printable PDF for a total of over 40 pages, and 80 minutes of coordinating video tutorials. Julie’s talented contributors include card makers Laura Bassen & Michelle Wooderson. "


And now hop on over to brand-new Garden Girl Lisa Dickinson's blog for more inspiration + giveaways!

January 21, 2013

Echo Park Blog Hop - Love Story


Welcome to the Echo Park Paper Design Team Blog Hop! Today the Echo Park Paper Design Team is showcasing projects from our latest collections. I made this simple Valentine's card with the Love Story Collection. I love the bunting sticker in this collection and it as a perfect place to add more flag stickers and brads to my design. A fancy brad and some flag stickers complete this quick and easy card.
Be sure to follow the blog hop list below as you hop from one blog to the next. Return to the Echo Park Paper blog at any time for the next blogger on the list in case you get lost! 


One winner will be selected from each blog to receive an Echo Park Paper collection kit of their choosing. To qualify for the kit, comments will be due by midnight EST, Sunday, January 27th to qualify for the drawing. The winner will be announced on each blog Monday, January 28th  so be sure to check back to see if you've won.

January 10, 2013

Project Life Photo Freedom Style

Taking a quick breather to post here. I missed blogging for a while. Holidays, deadlines, creating for CHA and videos have kept me busy. But it's all quieting down now and we're settling into our slow winter routines. Quiet days spent indoors = lots of crafting time for Mom.

I have a stack of Christmas layouts and project life Photo Freedom Projects to share.

Let's start with this simple Echo Park one. Created with the This n That Collection. Pretty straightforward and linear, I used alternate strips of paper and stickers. The skinny title was cut with a Silhouette.
This one was created using the by Winter Tortellini and Spinach Soup line by Jillibean Soup. Say that three times fast. Ha! The layout is divided into quadrants - 2 for photos and 2 for decorating. This left me a great space for layering some of my favorite patterned papers. This would be great to do with leftovers from a 6x6 paper pad.
This is the start of my project life project using the Photo Freedom products by Echo Park. I used one each of all the page protectors they make just to get a feel for the system. I've never done project life style scrapbooking, so this was a challenge. I really liked it! I began the project with this traditional 12x12 layout.
I used  the Horizontal 4x6 Photo Sleeves to create this layout. All stickers and paper are from the Dear Santa Photo Freedom line.
This is the 6x12 Photo Sleeve. I love how easy it was to combine an enlarged photo and then slivers of 3 different ones in one pocket. And if you're wondering about that oddly placed snowflake in 'Rockefeller', it's because I added an extra 'r' in there and the mistake was burning my eyes.
This is the 4x6 Vertical Sleeve. I can see using this one again and again. For some reason, I've gotten in the habit of turning my camera to crop out background stuff I don't want in the shot. This means I probably have 10x more vertical photos than horizontal.
This is the traditional project life photo sleeve. I tried to change it up a bit by cutting one enlarged photo (6x8) into three of the sleeves. It adds impact without taking away from the picture. In the bottom pocket, I filled it with punched circles, glittered chipboard and then a sprinkle or two of more glittered. I sewed it shut to make sure everything stays in place.
And a quick close up of the glittery pocket.
I have to say that working with the Photo Freedom project may have hooked me on this quirky & easy style of scrapbooking. There are a trip or two that I want to get into scrapbooks this way. I'm in the planning stages and hope to share a video soon of my progress.